컨텐츠 내용을 수정할 수 있습니다
Don't just memorize pathogen names. Start with Standard Precautions for every patient, then layer on anticipated exposure and transmission routes. Think through hand hygiene, PPE, patient room, transport, environment, and post-exposure actions as one connected flow.
Core decision flow: First, block transmission right now → Always maintain Standard Precautions → Proactively apply additional precautions based on the clinical syndrome → Select PPE according to the exposure task → Remove without contamination and perform hand hygiene → Adjust based on test results and clinical course.
In local exam summaries, sterilization, vascular access devices, isolation, and PPE show up as recurring themes. Actual questions, answers, tables, and images are not reproduced here; the content has been restructured using current public guidelines from the CDC and OSHA.
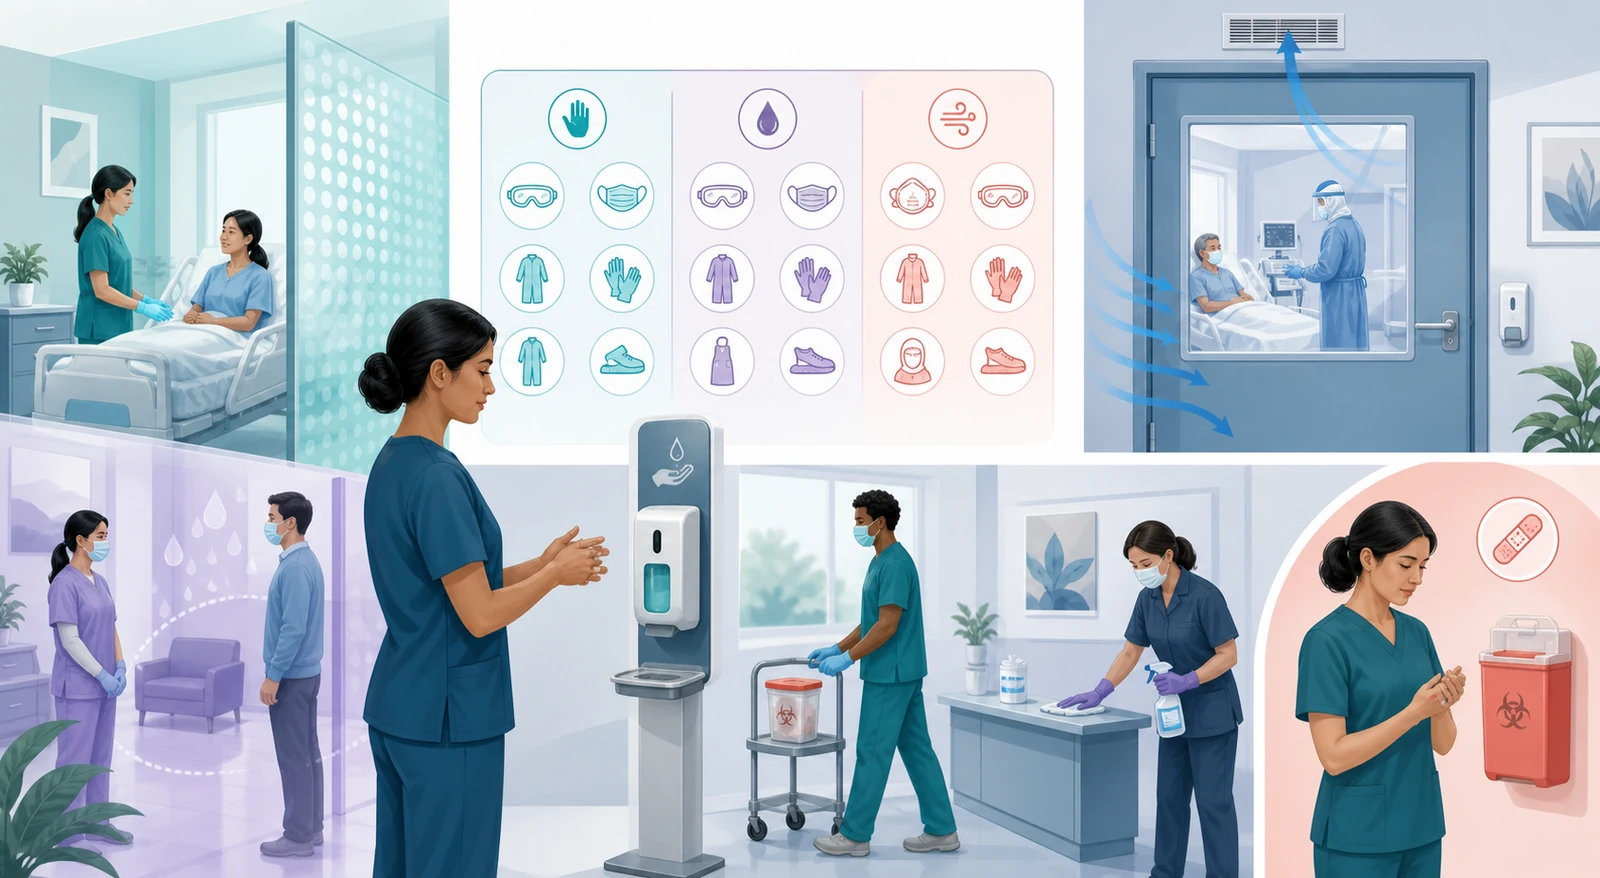
Standard Precautions are your starting point for every patient, in every healthcare setting. They include hand hygiene, PPE based on anticipated exposure, respiratory etiquette, safe injection practices, environmental cleaning, and reprocessing of reusable equipment. Even when additional isolation precautions are added, Standard Precautions never go away.
First, assess whether contact with or splashes of blood, body fluids, secretions, excretions, mucous membranes, non-intact skin, or contaminated equipment are anticipated.
Select gloves for hand contact, a gown for skin and clothing contamination, and a mask plus eye protection for the risk of splashes to the facial mucous membranes.
Even with the same patient, change gloves and perform hand hygiene when moving from a contaminated site to a clean site. Gloves are not a substitute for hand hygiene.
Remove PPE so the contaminated side doesn't touch your skin or clothing, and dispose of it in the designated area. Hand hygiene after removing PPE is the final, essential step.
| Situation | Preferred Method | Key Point for Decision-Making |
|---|---|---|
| Routine clinical situation when hands are not visibly soiled | Alcohol-based hand rub | Use it before and after patient contact, before aseptic tasks, and right after removing gloves. |
| Hands are visibly soiled with blood or body fluids | Soap and water | This physically washes away the contamination. |
| Context of spore-forming pathogens or infectious diarrhea | Soap and water, reinforced per facility policy and CDC guidelines | Apply this together with gloves and environmental disinfection; an alcohol-based hand rub alone won't solve the problem. |
| When wearing gloves | Hand hygiene after glove removal | This step cannot be skipped because of the potential for micro-tears and contamination during removal. |
| Category | Core Barrier | Room & Transport | Key Consideration |
|---|---|---|---|
| Contact Precautions | Gloves and gown for any contact with the patient or their environment | Dedicated or disinfectable equipment; minimize transport | This includes not just direct contact but also the surrounding environment like bed rails and equipment. |
| Droplet Precautions | Surgical mask when entering the room at close range; eye protection if there's a splash risk | Private room if possible; patient wears a mask and practices respiratory etiquette during transport | Don't mechanically equate this with the respirator used for small airborne particles. |
| Airborne Precautions | Fit-tested respirator | Airborne infection isolation room; keep the door closed; minimize transport | Put the respirator on before entering the room, and remove it after you've come out and closed the door. |
| Protective Environment | Protects the immunocompromised patient from the outside environment | Facility-specific air and environmental standards | The goal is the opposite of transmission-based isolation, so don't memorize it using the same rules. |
Airborne precautions, a proper isolation room, respiratory protection, and minimizing transport are key. A simple surgical mask is not a substitute for healthcare worker respiratory protection.
Airborne precautions are central, and for varicella you also consider contact with lesions. Check immune status and facility placement policies too.
Focus on droplet precautions, but if a procedure carries an aerosolization risk, add extra respiratory protection.
Contact precautions plus environmental and equipment disinfection matter most. Use a disinfectant appropriate for the pathogen and surface.
| Before Donning | While Wearing | During Removal |
|---|---|---|
| Hand hygiene, gather needed equipment, check respirator seal | Don’t touch your face; replace immediately if torn or contaminated | Remove the most contaminated items (gloves, gown) safely first; don’t touch the front of facial protection |
| Choose the right gown, gloves, and eye protection for the task | Never reuse between patients | Remove the respirator after leaving the room and closing the door; perform hand hygiene last |
Follow your facility’s donning and doffing sequence and training tools, but on the exam, prioritize checking: Are you grabbing the contaminated front with your bare hand? Are you skipping hand hygiene after removing gloves? Are you taking off an airborne-precautions respirator while still inside the room?
| Device | Insertion & Maintenance Key Points | Daily Check |
|---|---|---|
| Indwelling Urinary Catheter | Insert aseptically when indicated; maintain a closed drainage system | Ongoing need, kinks, drainage bag kept below the bladder, contamination-free specimen collection |
| Central & Peripheral Vascular Devices | Hand hygiene, aseptic technique, disinfection of access ports | Redness, pain, swelling, drainage, function; if no longer needed, review for removal |
| Respiratory Equipment | Prevent condensate and circuits from contaminating the patient or staff | Secretions, oxygenation, circuit disconnections or leaks, oral care and positioning |
Non-critical equipment that touches the patient’s immediate surroundings — like blood pressure cuffs, stethoscopes, thermometers, and transport equipment — should either be dedicated to a single patient or cleaned and disinfected with an approved method before use on the next patient. For any disinfectant, follow the product instructions and facility policy regarding target surface, contact time, dilution, and required PPE.
Look beyond the patient — check any equipment, bedside surfaces, and transport containers that were touched.
Place contaminated linens, specimens, and waste into designated containers without leaks.
Choose cleaning, disinfection, or sterilization based on the body site contacted and the degree of risk.
Move the patient only when necessary, but don’t arbitrarily delay care. Notify the receiving department and transport personnel about the required precautions ahead of time. Cover the infected site, and if the patient has respiratory symptoms, apply an appropriate mask and reinforce respiratory etiquette. Don’t walk through the hallway while still wearing contact-precautions PPE that’s already contaminated.
What to do: Don't wait for a confirmed test result. Provide the patient with a mask if possible, teach them cough etiquette and hand hygiene, and quickly separate them from others. Before contact, choose PPE based on the clinical syndrome and the risk of the procedure you're about to perform, and adjust additional precautions as you go through the testing process.
Choices to avoid: Placing the patient in a regular room first and then isolating them only after a positive result comes back, or applying the same highest-level PPE uniformly to all staff.
What to do: Even for the same patient, this is a situation where you're moving from a dirty, contaminated site to a clean, aseptic access point. Remove your gloves, perform hand hygiene, and then put on a new pair of gloves and use the necessary aseptic technique to handle the connection port.
The reason: The purpose of gloves isn't to make your hands permanently clean; it's to create a barrier for that specific task.
What to do: Immediately wash the site and report it right away to get an urgent medical evaluation. Record the route and time of exposure. Decisions about checking the source patient's information, baseline testing, and any necessary post-exposure prophylaxis are made by following expert advice and your institution's protocol.
Choices to avoid: Waiting until you know the patient's infection status, only telling a colleague informally, or squeezing the wound hard.
다음 이론을 계속 학습하려면 로그인하세요.
로그인하고 계속 학습필기노트, 하이라이터, 메모는 잘 쓰고 있어?
내보내줘운영진이 검토할게요!
마이페이지에서 차단한 회원을 관리할 수 있어요.